Start booting from USB device что делать
При попытке установить операционную систему с флеш-накопителя пользователь может столкнуться с появлением на экране надписи «Start booting from USB device…», после чего система зависает и далее ничего не происходит.
Обычно это связано с ситуацией, когда загрузочная флешка с операционной системой не была корректно создана пользователем, потому система испытывает проблемы в установке новой версии ОС с данного устройства.
В данном материале я расскажу, в чём суть проблемы «Start booting from USB device», каковы её причины, и как исправить появление надписи на вашем ПК.
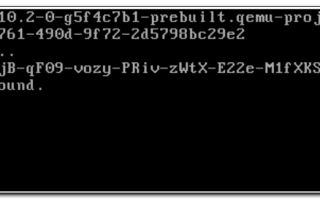
Экран с застывшей надписью «Start booting from USB device…» выглядит примерно так
Почему появляется данная дисфункция?
В переводе данный текст звучит как «Начало загрузки с устройства USB…», обычно появляясь при загрузке установочной версии ОС Windows с ЮСБ-устройства.
Причинами «зависания» надписи «Start booting from USB device» обычно являются некорректно созданная установочная флешка, а также неверно указанные настройки в БИОСе пользовательского ПК.
Причиной дисфункции может выступать некорректно созданная установочная флешка
Как исправить «Start booting from USB device»
Для устранения ошибки «Start booting from USB device» рекомендую выполнить следующее:
- Проверьте, загрузочное ли ваше ЮСБ-устройство. Для этого рекомендую использовать программный инструмент «MobaLiveCD», который проверит загрузочный статус вашей флешки. Данная программа не требует установки, работает сразу после запуска, довольно легка и удобна в использовании.
Способ 1.Для работы с «MobaLiveCD» скачайте и запустите данную программу с правами администратора. На главном экране кликните на кнопку «Run the Live USB», укажите программе путь к вашей флешке.
Если программа спросит вас «Do you want to create a hard disk image for your virtual machine?» — выберите «No».
Программа произведёт эмуляцию запуска системы с вашей флешки, и вы воочию увидите результат.
Работаем с с «MobaLiveCD»
Для выхода с программы нажмите клавиши Ctrl+Alt.
- Проверьте, поддерживает ли ваш компьютер загрузку с USB. Далеко не все ПК поддерживают данную функцию (особенно это касается устаревших версий материнских плат), потому вам необходимо или просмотреть характеристики вашей материнской платы относительно поддержки ею загрузки с ЮСБ, или непосредственно перейти в БИОС и просмотреть, имеется ли в нём соответствующая опция;
- Настройте ваш ПК для загрузки с флеш-накопителя. Перейдите в БИОС и установите там соответствующие опции, в частности, в последовательности загрузочных дисков установите флеш-накопитель первым для загрузки;Выбираем флеш-накопитель первоочередным устройством для загрузки
Чтобы проверить файловую систему вашей флешки подключите её к компьютеру, в проводнике кликните на флеш-накопителе правой клавишей мыши, в появившемся меню выберите «Свойства».
- Попробуйте изменить значение некоторых параметров БИОСа. Перейдите в ваш БИОС, и поменяйте значение опции «Legacy» с «Enabled» на «Disabled» (или наоборот). Сохраните настройки, перезагрузите компьютер, и попробуйте вновь установить систему с флеш-накопителя;
Способ 2. Если предыдущий способ не помог исправить Start booting from USB device, попробуйте выполнить следующее.
Перейдите в БИОС, во вкладке «Boot» установите значение параметра «Secure Boot» на «Disabled» (если появится предупреждение, смело жмите на «Ок»).
Появится дополнительная опция «ОS Mode Selection», выберите здесь «UEFI and Legacy OS» (если появится предупреждение, тогда вновь нажимаем на «ОК»). Вновь жмём на F10, затем на «Yes», дожидаемся перезагрузки ноутбука.
Затем вновь переходим в БИОС, во вкладке «Boot» выбираем опцию «Boot device priority», в первом пункте выбираем нашу флешку как загрузочное устройство. Вновь жмём на F10 и «Yes». Перезагружаем наш ПК и пробуем загрузиться с нашего флеш-накопителя.
- Для создания загрузочной флешки используйте зарекомендовавший себя софт (например, Rufus).Для записи образов на USB используйте программу «Rufus»
Заключение
Проблема с «Start booting from USB device» может быть вызвана рядом причин, начиная от неправильной настройки БИОСа, и заканчивая некорректным созданием загрузочной флешки. Для избавления от ошибки Start booting from USB device» рекомендую воспользоваться приведёнными выше советами, это позволит провести нормальную инсталляцию Виндовс с помощью флеш-накопителя на вашем ПК.
Как вы оцените статью?
(13
Источник: https://RusAdmin.biz/oshibki/start-booting-from-usb-device-chto-delat/
Grub – как восстанавливаться в rescue mode ( Статьи – Компьютерное : Linux: как перестать удивляться, и начать работать )
В Grub Rescue Mode доступно очень немного команд. И поэтому восстановление происходит следующим образом: сначала нужно всеми силами попытаться подгрузить все модули, чтобы стала доступна вся функциональность Grub, а затем уже запуститься с нужного раздела будет легко.
Как известно, Grub состоит из двух частей.
Первая часть записана в MBR диска. Она и содержит базовую функциональность, то есть в ней есть консоль в rescue mode и ничего больше. В rescue mode нет даже команд загрузки системы с нужного раздела.
Поэтому-то и нужно вначале определить, на каком разделе находится вторая часть груба (она лежит в каталоге /boot/grub), подгрузить недостающие модули.
И только потом можно будет дать команду запуска с нужного раздела.
В rescue mode доступно всего четыре команды:
lssetunset
insmod
Вначале следует дать команду:
ls
В ответ она выведет, например, следующее:
(hd0) (hd0,msdos3) (hd0,msdos2) (hd0,msdos1) (hd1) (hd1,msdos2) (hd1,msdos1)
По непонятным причинам, в данном примере Grub даже не понимает, какие файловые системы находятся на разделах дисков, и почему-то их считает как msdos.Нам нужно постараться угадать, какие диски мы видим.
В данном случае видно два диска. Диск с индексом 0 содержит три раздела, диск с индексом 1 содержит два раздела. Я знаю, что мой линукс, который мне нужно загрузить, находится на диске с тремя разделами.
Поэтому делаю вывод, что мне нужен hd0.
По непонятным причинам Grub называет разделы в обратном порядке. И становится непонятно, что имеется в виду под (hd0,msdos3) – первый раздел или третий? Тут можно выкрутиться, использовав синтаксис (hd0,1). Нужно помнить, что в Grub счет дисков начинается с 0, а счет разделов – с 1.
Так как я знаю, что Linux в моем случае установлен на первый раздел, то нужный мне раздел будет обозначаться (hd0,1). Выяснив обозначение радела, нужно дать команды:
set prefix=(hd0,1)/boot/grub
set root=(hd0,1)
Этими командами мы указываем использовать диск (hd0,1) для дальнейших команд. После чего нужно проверить, действительно ли на этом разделе есть то что нам нужно. Даем команду:
ls /boot/grub
… и если в ответ получаем список всех файлов в этой директории, то считам, что дальше все пойдет как по маслу.
Даем команды:
insmod ext2insmod normal
normal
После чего Grub перейдёт в полнофункциональный режим. Он автоматически найдет все операционки, которые можно подгружать, и покажет своё Grub-меню.
Дальнейшее восстановление обычно сводится к тому, чтобы загрузить нужный нам Linux, и в нем от рута дать команду:
grub-install /dev/sda
Эта команда переустановит в MBR код Grub-а таким образом, что он автоматически будет подхватывать свою вторую часть с раздела, с которого вы и загрузились.
Источник: https://webhamster.ru/site/page/index/articles/comp/196
Что делать, если появляется ошибка error no such partition? И как восстановить загрузчик?
Хочу поделиться небольшой историей о том, как я благополучно снес Ubuntu, но ничем хорошим это не кончилось.
У меня на ноутбуке HP стоит Windows 10, но мне захотелось попрактиковаться в работе с Linux-системами, для чего я установил Ubuntu. Поработав в ней немного, я решил ее снести (стёр раздел с Ubuntu утилитой AOEMI Partition Assistant) и установить на виртуальную машину – Virtual Box. При этом, ноутбук я не выключал.
Я отошел на час и когда вернулся ноутбук выключен, когда я его включил, появляется сообщение на черном экране — no such partition grub rescue.
В нашем случае, Grub – загрузчик для Linux, ведет запись информации на первый раздел диска MBR, файлы загрузчика помещаются на раздел с установленной системой в моем случае на раздел с Ubuntu.
Я удалил раздел с системой Ubuntu, в итоге загрузчика физически не существует, о нем остались только некоторые записи. Ноутбук не может ничего делать, а в Windows просто так вы не попадете.
Проводим восстановление загрузчика Windows 7
Как восстановить загрузчик в Windows 8
Проводим восстановление загрузчика Windows 10
К счастью, решение проблемы я нашел быстро, причем не одно, сейчас я расскажу, что нужно делать при появлении такой проблемы.
Как исправить ошибку no such partition?
Для решения этой проблемы есть два способа – использование загрузочного Live CD дистрибутива Linux, либо загрузочный диск или флешка с Windows. При себе я имел только флешку с Windows. Но расскажу и о методе при помощи Linux.
Полезно: Как установить Ubuntu (Подробная инструкция)
Исправляем с помощью Linux
Возьмите загрузочный диск, можно и флешку с Linux, например, Mint, а может быть у вас есть Ubuntu. Создать такой носитель придется на другом компьютере. Загрузитесь с него. Теперь нам понадобится терминал, для этого зажимаем клавиши Ctrl+Alt+T. В терминале пишем команду:
sudo apt-get install lilo
Начинается загрузка пакета, а потом его установка, после чего вводим вот эту команду:
sudo lilo -M /dev/sda mbr
Хочу заметить, что для установки пакета вам понадобится интернет.
Теперь вы можете перезагрузить компьютер и убедиться, что ошибка error no such partition entering rescue mode исчезла.
Скорее всего вы столкнулись с проблемами еще при вводе команд. Например, не установился пакет lilo, либо вторая команда вообще не помогла. У меня было тоже самое и я не нашел этому решения, поэтому рекомендую использовать загрузочный диск с Windows.
Исправляем с помощью Windows
В данном пункте мы будет восстанавливать загрузчик, а старые записи о grub будут очищены. Вот, что необходимо сделать:
- При установленной операционной системе Windows 7 необходим загрузочный носитель, либо флешка с этой системой, хотя, может подойти и любая другая, например, Windows 8;
- Загрузитесь с установочного диска/флешки. Должно появиться окно с предложением об установки Windows;
- Нам нужна только командная строка, поэтому нажимаем комбинацию клавиш Shift+F10;
- В окне командной строки нужно ввести команду bootrec. На выходе мы получаем ключи, которые можем использовать с этой командной:
- Bootrec /FixMbr – мы записываем главную загрузочную запись в системный раздел, а таблица раздела при это не перезаписывается. Применяем при повреждении загрузочной записи;
- Bootrec /FixBoot – записывает новый загрузочный сектор. Применяется, если загрузочный сектор был заменен, поврежден;
- Bootrec /ScanOs – ведется сканирование диска на все операционные системы, установленные на диске;
- Bootrec /RebuildBcd – используется для поиска всех ОС на диске, а также для перестройки хранилища конфигурации загрузки.
Для восстановления загрузочной записи я ввел команду с таким ключом – Bootrec /FixMbr.
После этого я перезагрузил компьютер и все стало работать. Появилась эмблема Windows 10, и я благополучно оказался в системе.
Источник: https://computerinfo.ru/error-no-such-partition/
5.2. Booting into Rescue Mode
Rescue mode provides the ability to boot a small Red Hat Enterprise Linux environment entirely from CD-ROM, or some other boot method, instead of the system's hard drive.
As the name implies, rescue mode is provided to rescue you from something. During normal operation, your Red Hat Enterprise Linux system uses files located on your system's hard drive to do everything — run programs, store your files, and more.
However, there may be times when you are unable to get Red Hat Enterprise Linux running completely enough to access files on your system's hard drive. Using rescue mode, you can access the files stored on your system's hard drive, even if you cannot actually run Red Hat Enterprise Linux from that hard drive.
To boot into rescue mode, you must be able to boot the system using one of the following methods:
- By booting the system from an installation boot CD-ROM.
- By booting the system from other installation boot media, such as USB flash devices.
- By booting the system from the Red Hat Enterprise Linux CD-ROM #1.
Once you have booted using one of the described methods, add the keyword rescue as a kernel parameter. For example, for an x86 system, type the following command at the installation boot prompt:
linux rescue
You are prompted to answer a few basic questions, including which language to use. It also prompts you to select where a valid rescue image is located.
Select from Local CD-ROM, Hard Drive, NFS image, FTP, or HTTP.
The location selected must contain a valid installation tree, and the installation tree must be for the same version of Red Hat Enterprise Linux as the Red Hat Enterprise Linux disk from which you booted.
If you used a boot CD-ROM or other media to start rescue mode, the installation tree must be from the same tree from which the media was created. For more information about how to setup an installation tree on a hard drive, NFS server, FTP server, or HTTP server, refer to the earlier section of this guide.
If you select a rescue image that does not require a network connection, you are asked whether or not you want to establish a network connection. A network connection is useful if you need to backup files to a different computer or install some RPM packages from a shared network location, for example.
The following message is displayed:
The rescue environment will now attempt to find your Linux installation and mount it under the directory /mnt/sysimage. You can then make any changes required to your system. If you want to proceed with this step choose 'Continue'.
You can also choose to mount your file systems read-only instead of read-write by choosing 'Read-only'.
If for some reason this process fails you can choose 'Skip' and this step will be skipped and you will go directly to a command shell.
If you select Continue, it attempts to mount your file system under the directory /mnt/sysimage/. If it fails to mount a partition, it notifies you.
If you select Read-Only, it attempts to mount your file system under the directory /mnt/sysimage/, but in read-only mode. If you select Skip, your file system is not mounted.
Choose Skip if you think your file system is corrupted.
Once you have your system in rescue mode, a prompt appears on VC (virtual console) 1 and VC 2 (use the Ctrl–Alt–F1 key combination to access VC 1 and Ctrl–Alt–F2 to access VC 2):
sh-3.00b#
If you selected Continue to mount your partitions automatically and they were mounted successfully, you are in single-user mode.
Even if your file system is mounted, the default root partition while in rescue mode is a temporary root partition, not the root partition of the file system used during normal user mode (runlevel 3 or 5).
If you selected to mount your file system and it mounted successfully, you can change the root partition of the rescue mode environment to the root partition of your file system by executing the following command:
chroot /mnt/sysimage
This is useful if you need to run commands such as rpm that require your root partition to be mounted as /. To exit the chroot environment, type exit to return to the prompt.
If you selected Skip, you can still try to mount a partition or LVM2 logical volume manually inside rescue mode by creating a directory such as /foo, and typing the following command:
mount -t ext3 /dev/mapper/VolGroup00-LogVol02 /foo
In the above command, /foo is a directory that you have created and /dev/mapper/VolGroup00-LogVol02 is the LVM2 logical volume you want to mount. If the partition is of type ext2, replace ext3 with ext2.
If you do not know the names of all physical partitions, use the following command to list them:
fdisk -l
If you do not know the names of all LVM2 physical volumes, volume groups, or logical volumes, use the following commands to list them:
pvdisplay
vgdisplay
lvdisplay
From the prompt, you can run many useful commands, such as:
- ssh, scp, and ping if the network is started
- dump and restore for users with tape drives
- parted and fdisk for managing partitions
- rpm for installing or upgrading software
- joe for editing configuration filesIf you try to start other popular editors such as emacs, pico, or vi, the joe editor is started.
5.2.1. Reinstalling the Boot Loader
In many cases, the GRUB boot loader can mistakenly be deleted, corrupted, or replaced by other operating systems.
The following steps detail the process on how GRUB is reinstalled on the master boot record:
- Boot the system from an installation boot medium.
- Type linux rescue at the installation boot prompt to enter the rescue environment.
- Type chroot /mnt/sysimage to mount the root partition.
- Type /sbin/grub-install /dev/hda to reinstall the GRUB boot loader, where /dev/hda is the boot partition.
- Review the /boot/grub/grub.conf file, as additional entries may be needed for GRUB to control additional operating systems.
Источник: https://access.redhat.com/documentation/en-US/Red_Hat_Enterprise_Linux/4/html/System_Administration_Guide/s1-rescuemode-boot.html
(Solved): Hard disk error HARD DISK 1 (3F1)
Hard disk error HARD DISK 1 (3F1) is associated with HP laptops and appears when the laptop hard drive that stores the OS gets damaged or corrupt. The HARD DISK 1 (3F1) error can also occur due to damaged operating system files (caused by bad sectors on the hard drive). An HP laptop with affected hard drive displays the following error when you turn it on.
| “Hard Disk ErrorPlease run the Hard Disk Test in System Diagnostics.Hard Disk 1 (3F1)F2 System DiagnosticsFor more information, please visit: www.hp.com/go/techcenter/startup“ |
In most cases, this problem resides within the hard drive. However, in some cases, the problem can be caused by a malfunctioning hard drive controller but that’s rare. Following are some solutions that you can apply to your system and fix it.
Solution 1. Hard Reset
A hard reset wipes out everything from the computer memory (cache, RAM, etc.) & restores the default functionality thus, re-establishing software connection between the hardware and the BIOS that could probably fix the hard disk error.
To hard reset your HP laptop, follow these instructions:
- Disconnect power cable
- Unplug all peripherals and USB devices
- Remove the battery. If it’s internal, open the laptop casing and disconnect the battery
- Press and hold the power button for a while to discharge any remaining current on the board (stored in capacitors, etc.)
- Then install/connect the battery and turn ON your laptop
Check if your system is able to boot completely. If not, proceed to the next step.
Solution 2. BIOS Reset Defaults
To reset BIOS defaults on your HP laptop, follow these instructions:
- Turn off your system and wait for 10 sec
- Turn it ON and start pressing F10 to enter BIOS
- Press F9 in the BIOS screen to select and load the BIOS Setup Defaults Setting.
- Press F10 to save settings and exit the BIOS
- Use the arrow to select Yes when prompted and then press Enter
Your system will reboot. If it still displays the same error, follow the next step.
Solution 3. Use HP PC Hardware Diagnostics
There are 6 different diagnostic tests that are performed either in Quick mode (takes 1-3 minutes) or extensive mode (takes more than 2 hours). To run diagnostics on hard disk, follow these steps:
- Plug in the AC adapter and make sure no other USB device is connected to the system
- Press and hold the power button for 5 seconds to turn the system off (if it’s on)
- Press the power button to turn the system ON and immediately start pressing the ESC key repeatedly 4-5 times. A menu list appears
- Press the F2 key
- Select Components Test from the HP PC Hardware Diagnostics menu
- Choose the hard drive using the arrow key
- Select Quick Test and then select Run Once
- Wait for the hard drive test to finish. If your system has more than one drive, select Test All Hard drives
- After the test, results are displayed. If the hard drive passes the Quick Test but the problem is still unsolved, run Extensive Test after a restart
Alternatively, you can press the F2 key when the error appears on the screen after turning ON your HP laptop. This opens further options for diagnostics. Press F4 to run Hard Disk Tests.
In case you are still stuck with the error, proceed to the next step
NOTE: Diagnostics can fix most problems but it can also damage the hard drive. As the drive is already damaged, running Extensive test can lead to drive failure.
Therefore, recover your data before proceeding to any step that involves the exhaustive use of the hard drive. This precaution can help you save your important data before the drive fails.
You can skip to step 5 for data recovery and drive repair process.
Solution 4. Reset the Hard drive
If your computer has fallen off or else has got jarred, it’s possible that the connection to hard drive gets loose.
- Remove the battery and makes sure all USB devices, power cable, etc. are disconnected from the laptop
- Open your HP laptop using Philips Screwdriver or similar tool. Use an anti-static strap or use a conductive foam pad while working with internal components of the laptop
- Unplug the hard drive, and then firmly reconnect it
Boot the system and check if it is able to boot successfully. In case it doesn’t, proceed to the next step.
Solution 5. Remove Hard Drive and Test it
If your system is running Windows XP, possibly the SATA drivers are not installed and that’s the reason why your system fails to boot and gets stuck on the error. Therefore, first check and install the SATA driver (refer to user manual of your system).
Alternatively, you can remove the hard drive from the system and test it by connecting to another PC using SATA to USB connector. If your drive is still not recognized, it’s probably damaged or corrupt. Proceed to the next step for recovery and re-installation process.
Solution 6. Use Data Recovery Tool
If none of the above-mentioned solutions work, use a reliable data recovery tool such as Stellar Data Recovery- Standard that facilitates recovery from an inaccessible, corrupt, and formatted hard drive. The ‘Deep Scan
Источник: https://www.stellarinfo.com/blog/solved-hard-disk-error-hard-disk-1-3f1/
Here’s how to fix Windows 10 Grub Rescue in 6 quick steps
Many PC users partition their hard disk for one reason or the other. For instance, PC user may want to dual boot two operating systems on one PC.
However, the aftermath of the partition sometime results in PC errors e.g. GRUB rescue error problem. This occurs when Windows PC users intend to boot their computer get stuck at the boot screen with the following error messages:
Example 1:
error: no such partition.
grub rescue>
Example 2:
error: no such partition.
Entering rescue mode…
grub rescue>
However, this error emanates for corrupt boot directory as well as the recent partition. Therefore, you can try out any of the enlisted solutions we have listed below to solve this problem.
Fix Windows 10 Grub Rescue issues
Solution 1: Set the correct partition
Sometimes, Windows users may deactivate the correct partition thereby resulting in the Windows 10 Grub Rescue problem. This is because the BIOS initiate the boot loader from the active partition.
Therefore, you need to check for the active partition and if it’s incorrect, you can activate the right partition. This should fix the Windows 10 Grub Rescue error display problem instantly.
Here’s how to do that:
- Connect the Windows 10 bootable media to your computer (DVD or USB flash drive)
- Restart your computer to enter into ‘Automatic Repair’ mode.
- Go to Troubleshoot > Advanced Options > Command Prompt to launch the CMD.
- Now, Type ‘diskpart’ without quotes and hit the ‘Enter’ key.
- Type the following commands one after the other:
- Then type the following commands one by one:
- list disk: ( this list all hard drives in your computer)
- select disk n: (n means the disk where the OS is installed. Here you can select disk 0 or any other disk where Windows 10 is installed.)
- list volume: (this list all volumes on disk 0 is listed.)
- select volume n: (the n implies the number of system partition.)
- active: (this indicates the active system partition.)
- From the list of the displayed system partition, determine the right partition which should be active.
- Type the following command and hit ‘Enter’ after each command:
- select partition d
- active
- quit
- Restart your PC afterwards.
This should resolve the Windows 10 grub rescue error startup problem.
- READ ALSO: How to enable Legacy Boot in Windows 10
Solution 2: Reset BIOS Settings
To reset BIOS settings, do the following:
- Shut down your PC and then start it up.
- Hit the “F2” key repetitively until the system screen window come into view.(Note: BIOS function key may vary depending on your system. Check for the BIOS Function key when you switch on your PC).
- Use the “Right Arrow” on your keyboard to navigate to the “Exit” menu tab.
- Now, hit on the “Down Arrow” and navigate to the “Load Optimized Defaults” option.
- Select the “Load Optimized Defaults” option, and then hit the “Enter” button.
Meanwhile, you can also flash your PC’s BIOS as an alternative to fix Windows 10 grub rescue problem. If you intend to flash your PC’s BIOS, check out our prepared walkthrough guide for this purpose.
Solution 3: Use Windows 10 Automatic Repair to restore the Boot Sector Code
Damaged boot sector code may cause the Windows 10 grub rescue error prompt. Therefore, restoring the boot sector code works could potentially fix the grub rescue issue.
- READ ALSO: FIX: Windows installation encountered an unexpected error
Follow the steps below to use restore boot sector code with Windows 10 automatic:
- Restart your PC few times during the boot sequence.
- From the list of options, Select Troubleshoot > Advanced options > Startup Repair.
- The repair process will now start.
- After the repair process is complete, check if the problem is resolved.
In addition, you can also use bootable Windows 10 DVD or USB flash drive to restore boot sector code.
- Connect the Windows 10 bootable media to your computer (DVD or USB flash drive)
- Restart your computer to enter into ‘Automatic Repair’ mode.
- Go to Troubleshoot > Advanced Options > Command Prompt to launch the CMD.
- Download this PC Repair Tool rated “Excellent” on TrustPilot.com.
- Click “Start Scan” to find Windows issues that could be causing PC problems.
- Click “Repair All” to fix all issues with Patented Technologies (requires upgrade).
- In the CMD window, type the following command and hit “Enter” afterwards:
- diskpart
- select disk 0
- list volume
- All volumes will be displayed. In “Type” column, you will find “DVD-ROM” value. (ensure you remember the drive letter of the Windows 10 bootable media you plugged to your PC). For instance letter E.
- Now, type the following command and hit Enter afterwards:
- Check to see if you have bootsect.exe files in the list. If yes, enter the following command keys and hit ‘Enter’ afterwards:
- bootsect /nt60 SYS /mbr
- Exit
- Restart your PC and check to see if the problem is resolved.
For various PC problems, we recommend this tool.This software will repair common computer errors, protect you from file loss, malware, hardware failure and optimize your PC for maximum performance. Fix PC issues now in 3 easy steps:
Note: In case you do not see the bootsect.exe file from the steps above, you may proceed to the next step in order to rebuild BCD.
Solution 4: Rebuild BCD using Windows 10 Automatic Repair
Rebuild BCD is another applicable method in fixing Windows 10 grub rescue problem.
Follow these steps to rebuild BCD:
- Connect the Windows 10 bootable media to your computer (DVD or USB flash drive)
- Restart your computer to enter into ‘Automatic Repair’ mode.
- In the Advanced options window, select “Command Prompt” to initiate the BCD files.
- In the CMD window, type the following commands in turn, and then hit the ‘Enter’ key afterwards:
- bootrec /fixmbr
- bootrec /fixboot
- bootrec /rebuildbcd
- After the process is complete, close Command Prompt, and then restart your PC.
This should probably resolve the Windows 10 grub rescue issue. However, if you are still experiencing the issue, you may proceed to the next solution.
— READ ALSO: How to Enable the Legacy Windows 7 Boot Menu Using Windows 10
Solution 5: Clean Install Windows 10
This method installs Windows 10 OS afresh on your PC thereby wiping off previous system installations.
Before you proceed, download Windows 10 ISO file with the ‘media creation tool’ on another PC, and then create a bootable USB drive with it or burn it on a DVD.
Follow these steps to clean install Windows 10:
- Download the Media Creation Tool from the official download website.
- Plug in the USB flash drive with at least 4 GB.
- Run Media Creation Tool and accept the License Terms.
- Select the “Create installation media (USB flash drive, DVD, or ISO file) for another PC” option.
- Pick the preferred language, architecture, and edition and click ‘Next’.
- Choose USB flash drive and then click ‘Next’.
- Wait for Media Creation Tool to download the setup and copy the installation files onto the USB flash drive.
- Finally, restart the affected PC.
- Plug in USB and start the Setup on your PC.
- Follow the prompts to setup new Windows.
Note: Ensure that the USB drive for the Windows 10 installation is 2.0 version instead of 3.0 or 3.1 and it’s at least 4GB.
Solution 6: Replace Hard Drive
Another alternative for fixing Windows 10 Grub Rescue issue is by replacing the hard drive. This is because the hard drive may be damaged hence resulting in the grub rescue startup problem.
Therefore, we recommend that you get another hard drive from your PC’s manufacturer websites, or mainstream retail sites such as Amazon or Aliexpress, and then replace it by yourself if you have the tech knowledge.
- READ ALSO: The 14 best hard drives for your Windows 10 PC
However, if you are unable to carry out the replace yourself, you can request the service of a computer engineer to replace the hard drive and clean install Windows 10 as well on your PC with the new hard drive.
In conclusion, we do hope that you were able to fix Windows 10 grub rescue problem by using any of the highlighted solutions we mentioned above. However, if you have any question regarding any of the solutions, feel free to drop us a comment below.
Are you experiencing any technical issue with your Windows PC? Drop us a message at the contact form located here for assistance.
RELATED STORIES TO CHECK OUT:
For various PC problems, we recommend this tool.
This software will repair common computer errors, protect you from file loss, malware, hardware failure and optimize your PC for maximum performance. Fix PC issues now in 3 easy steps:
- Download this PC Repair Tool rated “Excellent” on TrustPilot.com.
- Click “Start Scan” to find Windows issues that could be causing PC problems.
- Click “Repair All” to fix all issues with Patented Technologies (requires upgrade).
Источник: https://windowsreport.com/fix-windows-10-grub-rescue/
Grub2/Troubleshooting – Community Help Wiki
This page provides the user with information on options available for repairing GRUB 2 boot issues and specific instructions on how to use the GRUB 2 terminal. The instructions are written for GRUB 1.99, which is the version of GRUB 2 which is included on Ubuntu 11.04, Natty Narwhal, and later.
Differences for version 1.98 (Ubuntu 10.4, Lucid Lynx) are noted when the procedures differ.<\p>
GRUB 2's ability to fix boot problems is greatly improved over the original GRUB bootloader.
In addition to an automatic fallback mode if booting from a menuentry in a submenu, GRUB 2 allows the user to edit its menu before the operating system is loaded. The rescue mode GRUB 2 terminal can help boot an operating system so that permanent repairs to system files can be made.
<\p>
The instructions on this page are written for a fully-installed Ubuntu operating system. WUBI boot problems are not covered in detail although they are addressed in several sections.<\p>
Overview
GRUB 2 boot problems can leave the system in several states. The user may see one of the following displays on the monitor when a boot fails. The display provides the first indication of what might be causing the failure to boot.
Here are the failure prompts and displays, and the possible cause of each:
-
grub> prompt: GRUB 2 loaded modules but was unable to find the grub.cfg file.<\p>
-
grub rescue> prompt: GRUB 2 failed to find its grub folder, or failed to load the normal module.<\p>
-
grub>: – The grub prompt on a blank screen.
-
GRUB 2 has found the boot information but has been either unable to locate or unable to use an existing GRUB 2 configuration file (usually grub.cfg).<\p>
-
-
grub rescue>: – The rescue mode.
-
GRUB 2 is unable to find the grub folder or its contents are missing/corrupted. The grub folder contains the GRUB 2 menu, modules and stored environmental data.<\p>
-
-
GRUB – a single word at the top left of the screen, with no prompt and no cursor.
- GRUB has failed to find even the most basic information, usually contained in the MBR or boot sector.
-
Busybox or Initramfs: GRUB 2 began the boot process but there was a problem passing control to the operating system. Possible causes include an incorrect UUID or root= designation in the 'linux' line or a corrupted kernel.
<\p>
-
Frozen splash screen, blinking cursor with no grub> or grub rescue prompt. Possible video issues with the kernel. While these failures are not of GRUB 2's making, it may still be able to help.
GRUB 2 allows pre-boot editing of its menu and the user may restore functionality by adding and/or removing kernel options in a menuentry before booting.<\p>
Each of the GRUB 2 failure modes can normally be corrected either from the GRUB 2 terminal or by using an Ubuntu LiveCD. Additionally, there are compatible 3rd party bootable “rescue” CD/USB options which may also work.
If using an Ubuntu LiveCD, it is recommended, but not always necessary, to use the same version CD as the system you are trying to repair.
This ensures compatability of any modules and configuration files that may be loaded while attempting to repair the system.<\p>
GRUB 2 Terminal Commands
Here are some useful tips and features for use with the GRUB 2 terminal:
-
Turning off the splash image. This may make viewing the terminal easier. Press c at the GRUB 2 menu to get to the command line and then type: set color_normal=white/blue or the color combination you wish to use.
“black” as the second entry retains the menu's transparency and should be avoided as a selection if the user wants to work with a solid background color.<\p>
-
TAB completion. This feature is very handy. At any point, pressing the TAB key may complete an entry, if the element is unique, or display available options.
Typing a few additional characters and pressing TAB again may allow tab completion to finish the entry.<\p>
-
set pager=1 To prevent text from scrolling off the screen, type set pager=1.<\p>
-
Help. Type help to view a list of all the commands. Type help x to view help commands beginning with the letter “x”.
Tab completion and using the up arrow to repeat commands work the same as in a normal terminal.<\p>
Normal
When GRUB 2 is fully functional, the GRUB 2 terminal is accessed by pressing c. If the menu is not displayed during boot, hold down the SHIFT key until it appears.
If it still does not appear, try pressing the ESC key repeatedly.<\p>
From a GRUB 2 terminal with the grub> prompt, a wide variety of commands are available.
- A few of the more important commands:
Command
Result / Example
boot
Initiate the boot sequence, also F10 or CTRL-x
cat
Display the contents of readable files; cat (hd0,1)/boot/grub/grub.cfg
configfile
Load a GRUB 2 configuration file such as grub.cfg; configfile (hd0,5)/boot/grub/grub.cfg
initrd
Loads the initrd.img, necessary for booting; initrd (hd0,5)/initrd.img
insmod
Loads a module; insmod (hd0,5)/boot/grub/normal.mod, or insmod normal
linux
Loads the kernel; insmod /vmlinuz root=(hd0,5) ro
loop
Mount a file as a device; loopback loop (hd0,2)/iso/my.iso
ls
Lists the contents of a partition/folder; ls, ls /boot/grub, ls (hd0,5)/, ls (hd0,5)/boot
lsmod
List loaded modules
normal
Activate the normal module, if loaded
search
Search for a device. Type help search for the available options.
set
Review current settings, or set XXX to set a variable such as colors, prefix, root
vbeinfo
Display GRUB 2 available resolutions
To view the complete command list, type help. For details on a particular command, type help [command]<\p>
grub>
When GRUB 2 is unable to boot or display the GRUB 2 menu the system will be left at a GRUB 2 terminal if possible. If the system boots to the grub> prompt, the usual modules and commands are normally available. The user may need to manually load modules using the insmod [module] command before some commands will work.<\p>
grub rescue>
In the grub rescue mode, only a limited set of commands are available.
These commands are sufficient to investigate the contents of the drives, set prefix (path to the grub folder) and root (partition), load modules and boot.
<\p>
The rescue mode provides fewer commands than the normal GRUB prompt line, but also provides these additional commands:
-
Command
Result / Example
dump
Clears memory
exit
Exit GRUB 2
normal
Return to the standard “grub>” mode if possible.
Among the commands which can be used in the grub rescue mode:
-
boot
cat
chain
help
insmod
linux
ls
multiboot
normal
search
set
unset
General Troubleshooting Preparation
Boot-Repair
The majority of this guide is devoted to working with the GRUB 2 terminal, which is used to enter commands to attempt to repair a broken bootloader. Boot-Repair is a GUI application which can automatically analyze boot problems and select the proper course of action to repair them.
Its simple interface provides beginners as well as experienced Linux users an easy method of repairing the majority of GRUB 2 problems.
<\p>
Additionally, Boot-Repair contains an automated method to run a boot info script which performs a series of tests and provides a file containing much valuable information regarding the status of the computer's operating and boot systems.
This file can be inspected by community helpers on forums or IRC channels to help diagnose boot problems.<\p>
Boot-Repair can be run from a LiveCD or an operating Linux system. To download the package run the following commands:
- sudo add-apt-repository ppa:yannubuntu/boot-repair && sudo apt-get update
sudo apt-get install -y boot-repair && boot-repair
Visit the Boot-Repair community document for more information.<\p>
Boot-Repair is available from the Launchpad repositories and can be run from a CD or a working Linux OS.<\p>
Search & Set
A great many boot problems are due to incorrect paths to required files. The GRUB 2 terminal, in either 'failure' mode, provides a robust ability to search hard drive(s) and partitions and to inspect their contents.
<\p>
In order to boot successfully, the root, prefix, linux and initrd variables must be correct. The user must verify the paths and names of these items. If they are incorrect, use the commands below to find and fix them.
GRUB 2 variable settings can be viewed with the set command.
In the following examples, X is a hard drive number; Y is a partition number. If a command example includes either of these replace them with the appropriate value.<\p>
How & Where to Search
Источник: https://help.ubuntu.com/community/Grub2/Troubleshooting